- Blog
- 05.14.2020
- Data Fundamentals
Staging Data From Microsoft SQL Server into Synapse Using Matillion
Users getting started with Microsoft Azure Synapse may have a requirement to migrate their data from an existing on-premises data warehouse to their new cloud data warehouse. With Matillion ETL for Azure Synapse you can transfer your data from a Microsoft SQL Server instance into your Azure Synapse data warehouse. Let’s look at how to do that, and then build a Transformation Job to prepare our data for analysis.

Orchestrate your data migration
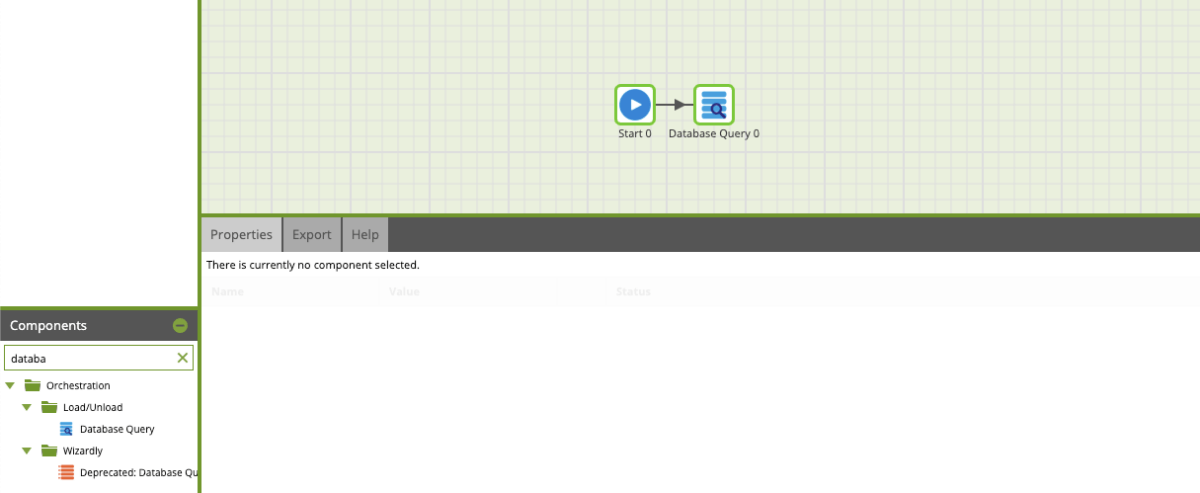
To get started, you will need to launch Matillion ETL for Azure Synapse from the Azure Marketplace. Once you have your Matillion ETL for Azure Synapse instance running, we will begin by creating an Orchestration Job. We will name this job upload-synapse. In order to transfer our data from our Microsoft SQL Server into our Azure Synapse data warehouse, we will use the Database Query component, which can be found in the Components panel.
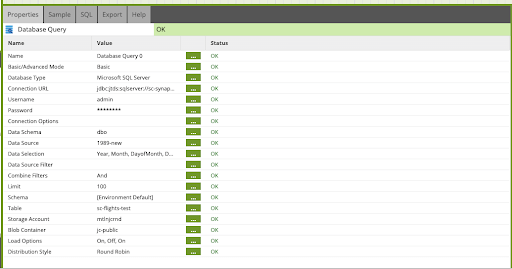
Within this component, we can use the properties to set up the parameters as follows:
- Select Basic Mode
- Add relevant credentials to access the Microsoft SQL Server database.
- Choose Data Schema, Data Source, and Data Selection. Note: all of these parameters should have populated dropdowns with data from your Microsoft SQL Server. If it didn’t populate, please make sure that your credentials are correctly entered.
- In this example, we will be selecting our 1989 flights data and all of the columns within this table.
- Set a table name – we chose sc-flights-test.
- Configure the storage account and the Azure Blob container accordingly.
Leave the remaining parameters at their default settings. If you need to, you can modify them depending on your use case.
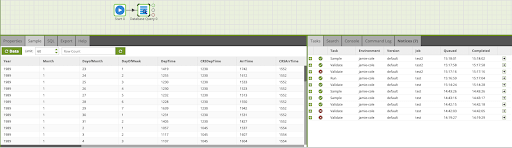
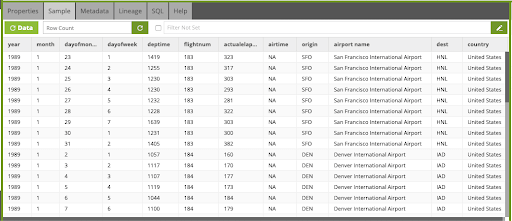
Matillion ETL gives you the ability to sample your data to check that the table and columns are selected correctly. When you select the Database Query component, you can go to the Sample tab and click on the Data button, which will load sample output up to the specified number of rows.
If everything looks correct, we can run this job by right-clicking on the canvas and selecting Run Job. Once this job has run, we will have successfully transferred our 1989 data from our Microsoft SQL Server database into our Azure Synapse account with the table name sc-flights-test.
Transforming your data for analysis
This data is now available for transformation in our Azure Synapse cloud data warehouse. To confirm this, we will build a Transformation Job that takes our sc-flights-test data (csv file linked here) and an airports table and joins them together on the airport codes.
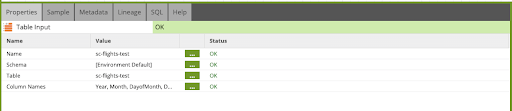
To start, we will go into the left main pane and create a Transformation Job – we will call this synapse-confirmation. Within the Transformation Job, we will look for the Table Input component in the Components panel and drag it onto the canvas.
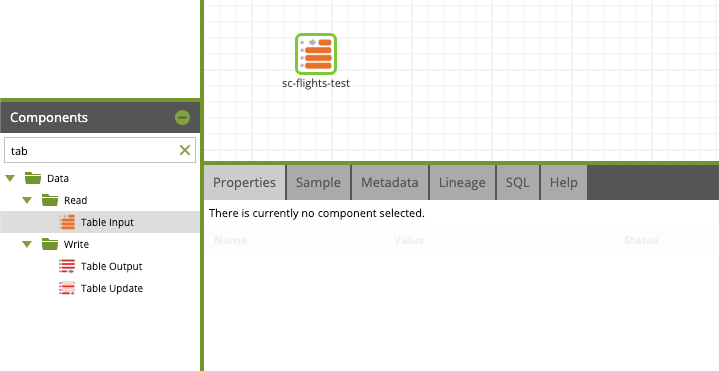
We will then configure this component with our newly created sc-flights-test table:
- Choose sc-flights-test from a dropdown in Table. If your table isn’t showing up in the dropdown, make sure you’ve selected the correct Schema.
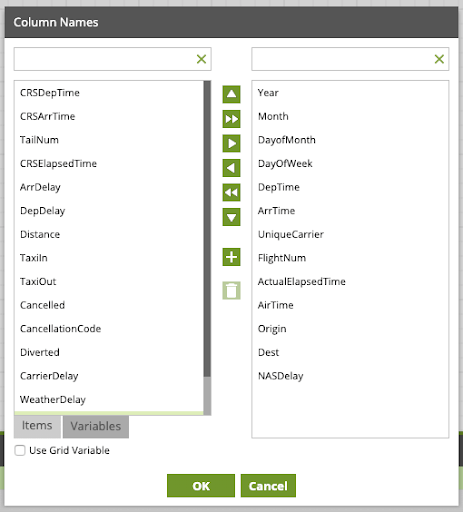
- The Columns Name parameter lets us be more selective with the columns we want to be using. We will thus only choose the columns relevant to our job.
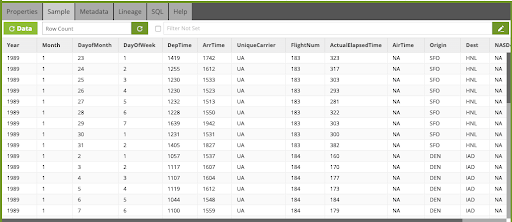
Once again, we will use the Sample tab feature to see the data that we are manipulating.
Next, we will use a Fixed Flow Component to generate some fixed airport values.
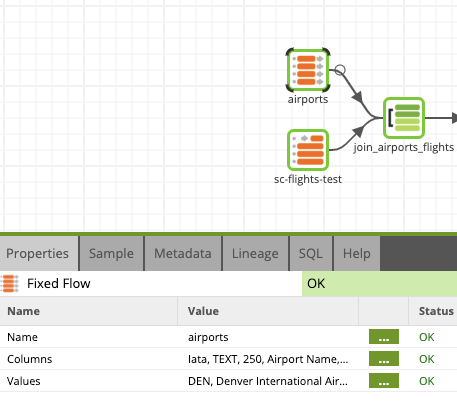
Under the Columns property, we will add the Iata, Airport Name, and Country columns.
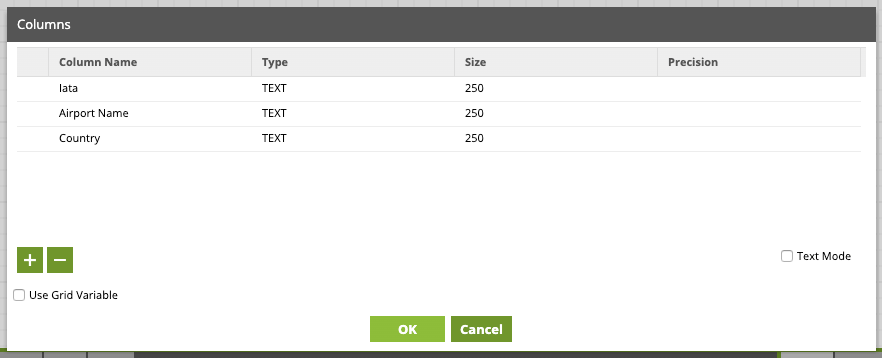
We can now hardcode our values under the Values property. To simplify things, we will only be adding four airports to this table.

Let’s now join our two tables together using a Join Component through the ‘iata column’ in order to get the full airport name in our sc-flights-test table.
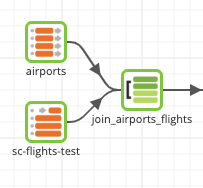
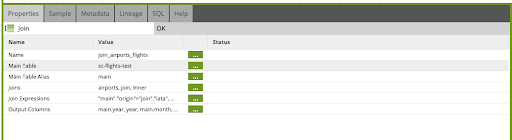
We will start by selecting sc-flights-test as our main table and connecting it to our airports table through an inner join.
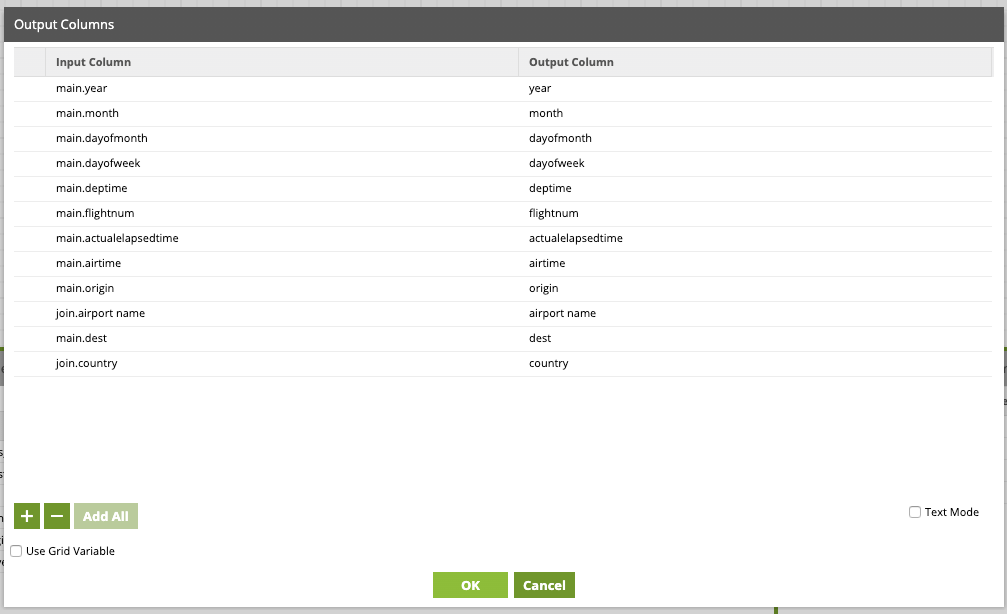
Once all other parameters have correctly validated, we can Add all the Output Columns. You can then remove duplicate columns – in this case I’ve removed join.iata.
To make sure that everything is correctly joined, we will use the Sample tab.
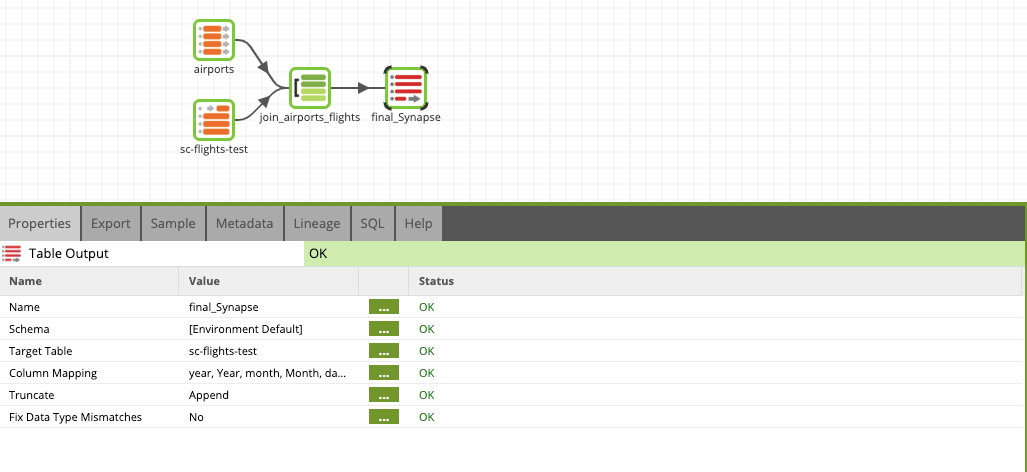
Seeing the sample gives us confidence that the Transformation Job is doing exactly what we expect. Since there’s an existing table to load the output into, we can move on to use the Table Output Component. We chose sc-flights-test table as our output table, we now have to map the new columns values to the existing ones.
This concludes how to transfer data from your Microsoft SQL Server to your Azure Synapse data warehouse using Matillion ETL for Azure. To get started migrating your data, start a free trial by launching Matillion ETL for Azure Synapse from the Azure Marketplace.
Featured Resources
Building a Type 2 Slowly Changing Dimension in Matillion's Data Productivity Cloud
A Slowly Changing Dimension (SCD) is a dimension that stores and manages both current and historical data over time in a data ...
BlogEnhancing the Data Productivity Cloud via User Feedback
Find a data solution that allows you the option of low-code or high-code, extreme amounts of flexibility, tailored for cloud ...
BlogHow Matillion Addresses Data Virtualization
This blog is in direct response to the following quote from ...
Share: