- Blog
- 09.28.2018
Error Handling Options in Matillion ETL – Creating a Shared Job
This is the final blog in a three-part series on Matillion ETL error handling options. This article describes how you can build a reusable shared job to handle any error in a consistent manner. This guide was written using Matillion ETL for Amazon Redshift but can be applied to Snowflake and with some modifications Google BigQuery.
I have set out the options available in the previous two blogs, now I will walk you through actually building a job. So first let’s establish what we need the job to do:
- I want to handle any errors that occur in a consistent way
- I want to be able to send an alert
- I want to be able to write to an audit table
Let’s suppose that I want to also update my audit tables on successful runs as well, but I don’t want to send a notification in this instance. Instead of creating another very similar job I will build in the option to turn functionality on or off.
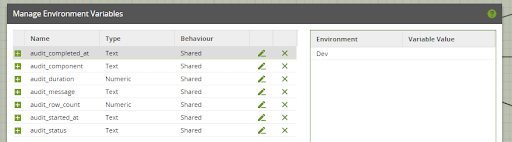
Firstly, you create some environment variables, as shown below, with the shared behavior so they are made available for our shared job.
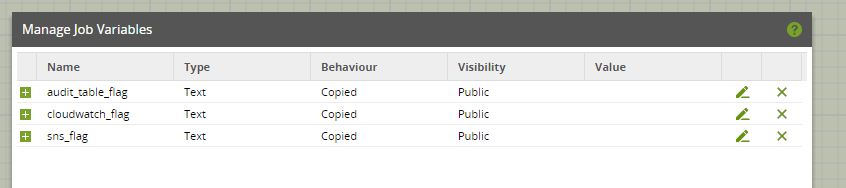
Next, create an orchestration job that will become your shared job. So that we can toggle the behavior of the alerting and audit tables you need to create some job variables.
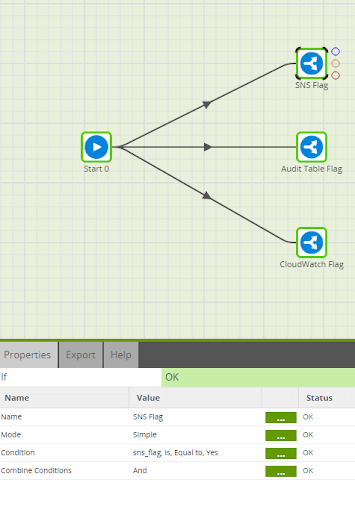
Next, configure some ‘If’ components to check if those variables are equal to “Yes”.
Next, drag an SNS, SQS, or Pub/Sub component onto the canvas and create some public job variables to parameterize the properties. In this example, I have used SNS, which you can see below:
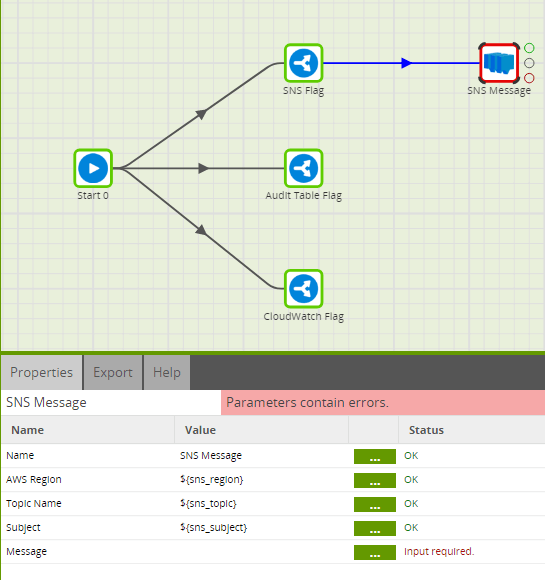
When it comes to the message you can use all of the environment variables you have set up previously. You also need to create a job variable called audit_job_name, which will be passed into the shared job from the originating job. Finally, you will make use of an automatic variable called run_history_id which is the unique id for that particular instance of your job. Your message should look something like this:
Job Name: ${audit_job_name}
Run History ID: ${run_history_id}
Component: ${audit_component}
Status: ${audit_status}
Message: ${audit_message}
Started at: ${audit_started_at}
Completed at: ${audit_completed_at}
Duration: ${audit_duration}
Row Count: ${audit_row_count}
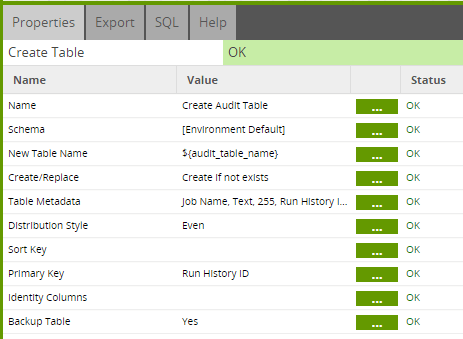
For the audit table branch first, you need a Create Table Component with a Create if not exists strategy set. Create a job variable called audit_table_name that will allow the component to be parameterized.
Edit the table metadata and use the text mode option and paste in the metadata for the columns below.
Job Name Text 255
Run History ID Text 255
Component Text 255
Status Text 255
Message Text 255
Started at DateTime 255
Completed at DateTime 255
Duration Numeric 10 2
Row Count Numeric 10 0
The Create Table Component properties should look like this:
Once you have configured this component, right-click and Run Component so the table is created and can be mapped in the next step.
Then you will need to create a new transformation job called “Populate Audit Table”.
In this new job, you are going to create job variables called audit_job_name & audit_table_name so the corresponding value can be passed through from your orchestration job.
Then you will configure a Fixed Flow Input Component so the columns can be pasted in using text mode as above.
You then need to map those environment and job variables to the columns using the ${} syntax or pasting in text mode the values below.
${audit_job_name}
${run_history_id}
${audit_component}
${audit_status}
${audit_message}
${audit_started_at}
${audit_completed_at}
${audit_duration}
${audit_row_count}
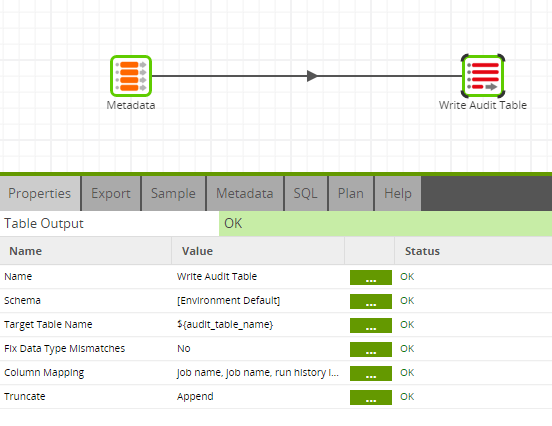
Finally, connect the Fixed Flow Input Component to a Table Output Component and map the columns. You will have to use a default value for audit_table_name in order to validate the component.
Now drag the transformation job onto the canvas and connect it to the Create Table Component and set the scalar variables as shown below:

Ignore the error, this will be populated at runtime.
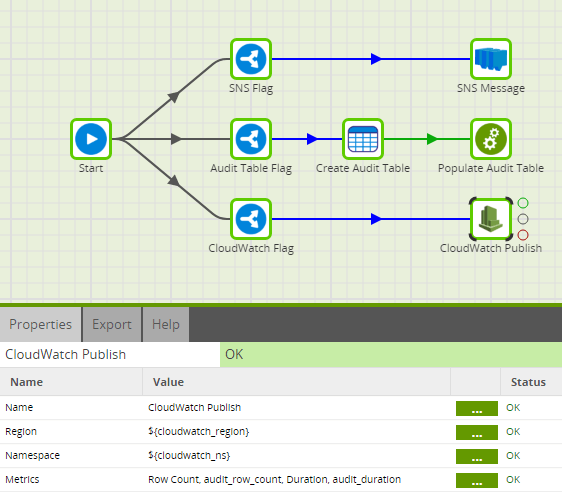
Next, create 2 more job variables called cloudwatch_region & cloudwatch_ns. Then configure the CloudWatch Publish Component to publish the numeric variables as metrics as shown below.
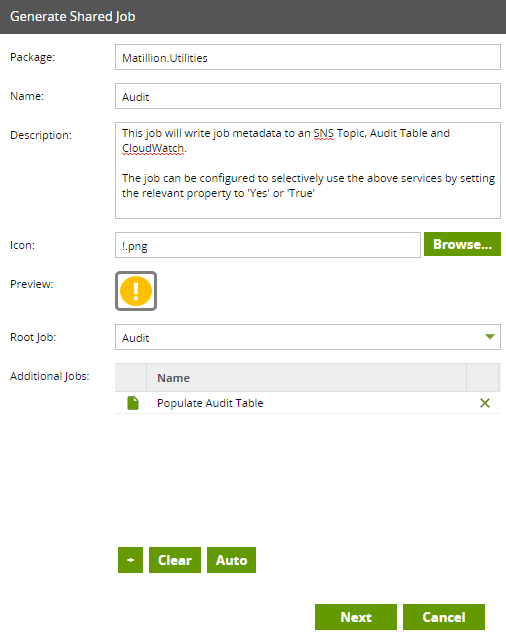
The job is now ready to be packaged as a Shared Job. To do this right click on the job in the Project Explorer menu and select Generate Shared Job.
Fill in the details and add an icon if you wish to do so as shown below.
Upon hitting Next you can also give some display friendly names to the job variables you created earlier.
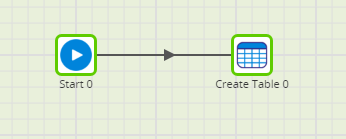
Now to test this you can build a simple job, for example, a job with a Create Table Component that has a Create strategy that will fail on the second time it is run.
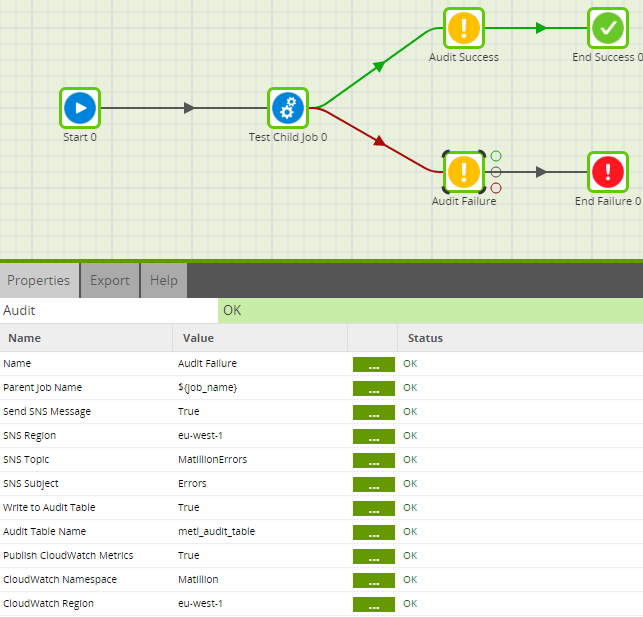
You can then create a parent job which contains the test job and the Shared Job connected to the On Success and On Failure nubs and configured as below.
This guide was written using Matillion ETL for Amazon Redshift but can be applied to Snowflake and with some modifications Google BigQuery.
I have attached my jobs to this document for you to download and try out including a simple test job.
- Audit Variables JSON
- Amazon Redshift Matillion ETL
- Amazon Redshift JSON
- Snowflake Matillion ETL
- Snowflake JSON
- BigQuery Matillion ETL
- BigQuery JSON
Other Options for Error Handling
Best Practices
Alerting & Audit Tables
Snowflake Resources
Environment Variables – Automatic Variable
Create Table Component
Fixed Flow Input Component
Table Output Component
Create Table Component
CloudWatch Publish Component
Shared Jobs
BigQuery Resources
Environment Variables – Automatic Variable
Create Table Component
Fixed Flow Input Component
Table Output Component
Create Table Component
CloudWatch Publish Component
Shared Jobs
Begin your data journey
Want to see how you can handle your ETL job errors? Select your data warehouse below to request a demonstration.
Featured Resources
Custom Connector for Public Statistics (Police API)
A demonstration of the practical steps for setting up components, manipulating and validating data, creating and scheduling ...
BlogMastering Git At Matillion. An In-Depth Guide To Merging
Merging in Git is the process of integrating changes from one branch into another. Merging is the backbone of collaboration in ...
BlogWhat is an API?
What is an API? An API is an application programming interface that is a way for two or more computer programs or components ...
Share: