- Blog
- 04.26.2024
- Data Productivity Cloud 101, Data Fundamentals
How to Source Yelp Review Data From Databricks To Snowflake For Sentiment Analysis With CortexML

Are you struggling to seamlessly source Yelp review data from Databricks into Snowflake for sentiment analysis, or are you just curious to learn more? Many organizations face challenges in transferring data across different cloud platforms efficiently. In this blog, we'll guide you through the process of leveraging Matillions Data Productivity Cloud to effortlessly integrate Databricks with Snowflake and apply CortexML for sentiment analysis.
Problem statement
Organizations often have multiple cloud data platforms. A common combination in the market is Databricks and Snowflake, which are used by IT data engineering and business units, respectively, for their daily tasks. While both platforms provide their benefits, one fallout of this approach can be the lack of necessary data in the other platform due to a shortage of time, tools, or resources to share the data reasonably.
Matilion helps bridge this gap with a code-optional data platform that supports multiple cloud data platforms. In this scenario, we will walk you through how easy it is to source data from your Databricks environment into your Snowflake instance using our Databricks connector in the Data Productivity Cloud. Then, we can apply a quick sentiment analysis using native Snowflake CortexML functionality through Matillion.
Configuring the Databricks Query Component
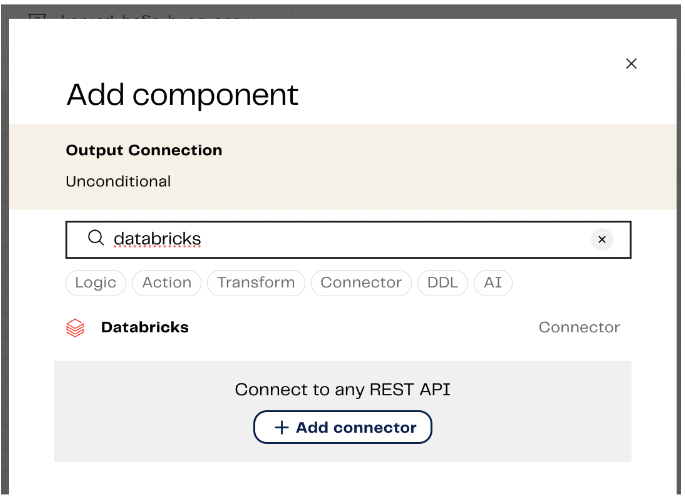
In a new orchestration pipeline, add the Databricks component to your working canvas.
Follow the documentation to configure your component. Matillion recommends all-purpose compute clusters or a Databricks SQL warehouse for this operation.
When configuring your connection information to Databricks, you will need to take your Server Hostname, HTTP path, and Catalog from your Databricks compute source. You can follow these steps to get that information: https://docs.databricks.com/en/integrations/compute-details.html

Once you configure your Connect tab information, the properties in the Configure section should begin to populate. This confirms your connection to your Databricks environment was successful. Let’s bring over a delta table from Databricks to Snowflake named yelp_business_reviews. This is a table from the free Databricks marketplace dataset “Yelp - Businesses Overview / Businesses Reviews Datasets” from Bright Data.

The final section to complete is the Destination tab, where we want to configure where to put this Databricks-sourced data in Snowflake. In the destination property, we will select Snowflake. Once Snowflake is selected, Matillion provides additional information to configure where to land the data.
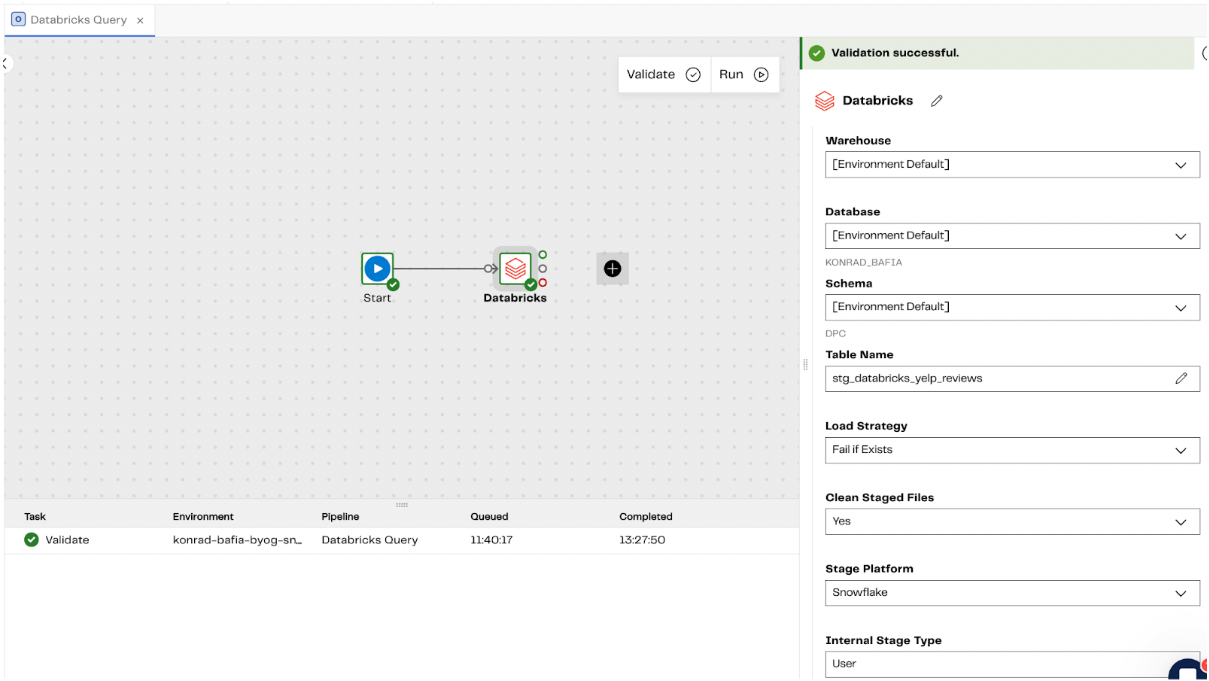
The component is now ready to run. When complete, a new table will be created by Matillion named stg_databricks_yelp_reviews in Snowflake.

And just like that, we loaded our records from Databricks to Snowflake in under 1 minute!

Now that we have our data in Snowflake, we can apply the cortex sentiment function to evaluate if our reviews in Yelp are positive or negative. We will do this through a new transformation job in Matillion, which we can name cortex_sentiment_analysis_yelp.
Let's bring in our newly loaded yelp_reviews dataset in Snowflake as our starting point for the transformation job.


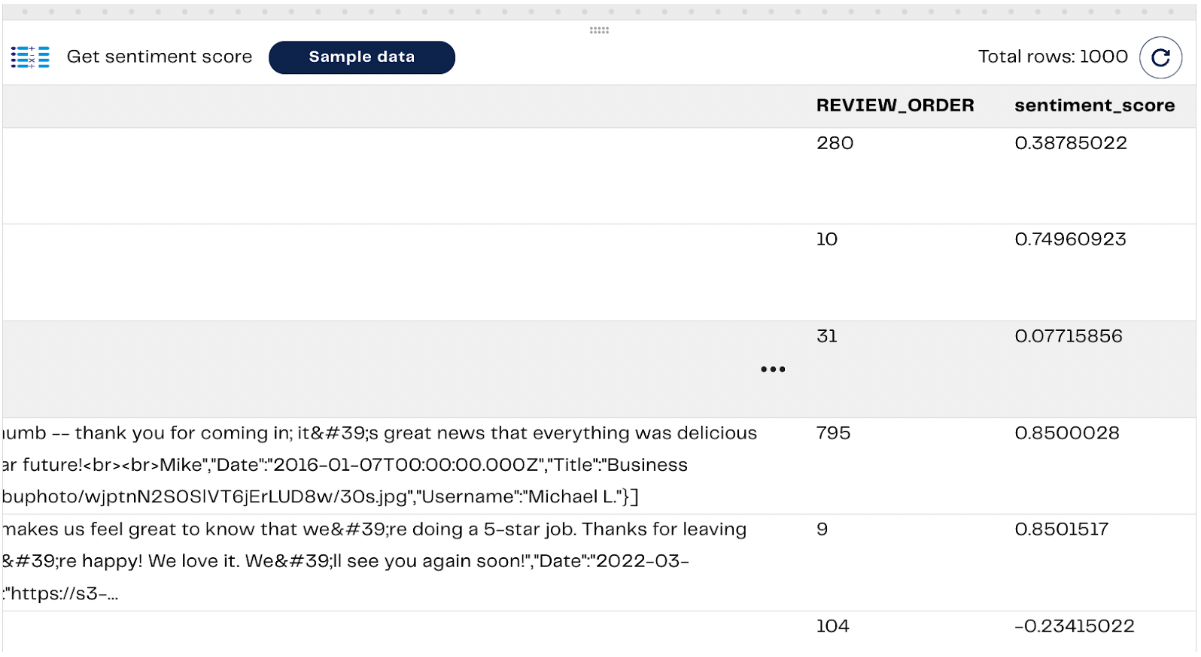
Next, let's add a calculator component so we can add the sentiment cortex function. Let's name it “Get sentiment score”
Using the CortexML Sentiment Function
In the calculations property, add an expression called sentiment_score in the calculator component.
In our dataset, the “CONTENT” field contains all the text reviews from Yelp, so our expression should look like this:
SNOWFLAKE.CORTEX.SENTIMENT("CONTENT")

The Snowflake cortex function returns a floating-point number from -1 to 1 (inclusive), indicating the level of negative or positive sentiment in the text. Values around 0 indicate neutral sentiment.
Afterward, we can add a new column to translate this sentiment score to a negative, neutral, or positive sentiment score.
Add another calculator component on the canvas and label it Sentiment Analysis.
In the calculations field, add a new column named sentiment_analysis and enter the following formula:

This will allow us to categorize the reviews into 5 unique categories: Very Negative, Negative, Neutral, Positive, and Very Positive.
The result should look like below:

We can output this to a new table called yelp_reviews_sentiment_analysis using the “Rewrite Table” component in Matillion.

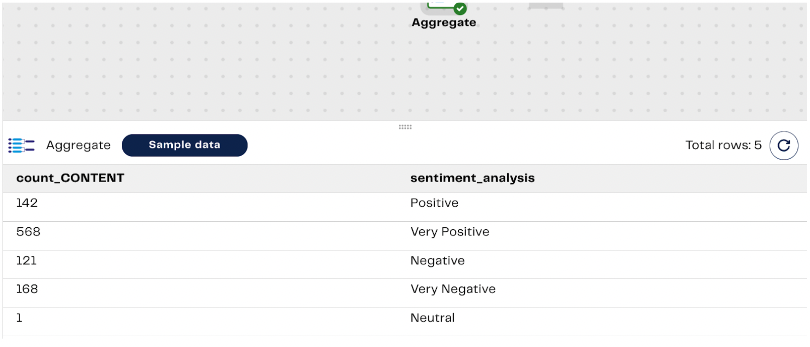
We can also create an aggregate view by sentiment type to see the distribution of review types in our data set using the aggregate component in Matillion.

We can set our Groupings to sentiment_analysis and our Aggregations as shown below:

The results should now show our sentiment_analysis categories with their corresponding record counts:
We can save this as a new view called v_yelp_reviews_sentiment_aggregate using the “Create View” component. Now, we are ready to run our transformation job!

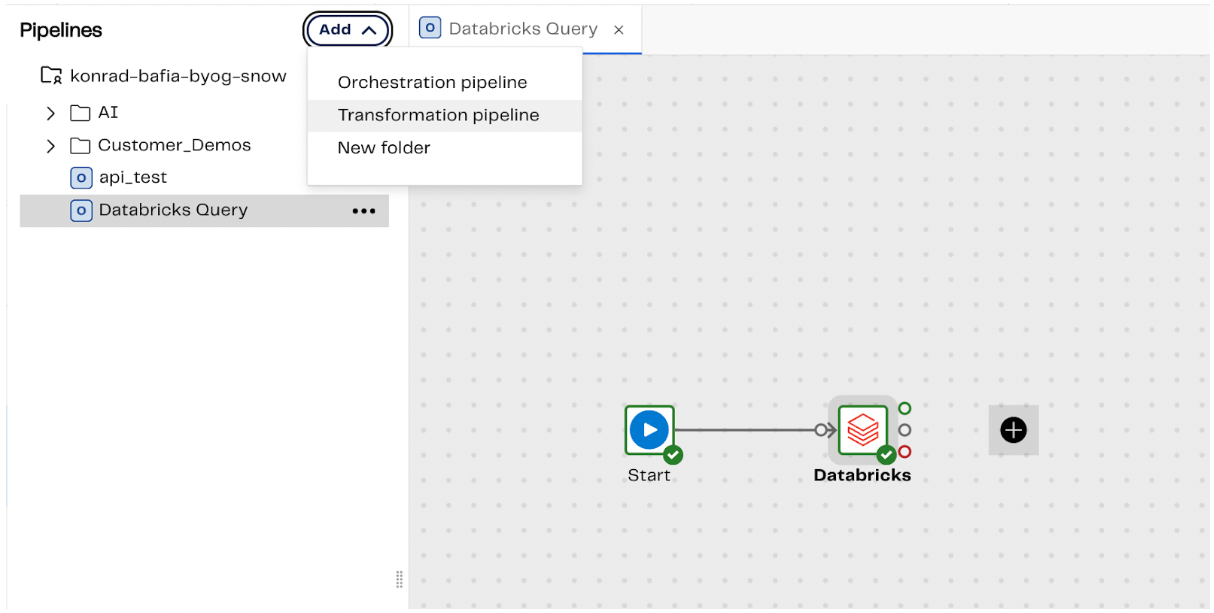
Let’s add it to our original orchestration job and run the entire pipeline from start to finish.
In our orchestration job, add your transformation to the canvas by dragging it from the pipelines list to the canvas. Connect it to your Databricks query component, then click run.

And just like that, we have a pipeline that runs in 15 seconds that sources data from Databricks into Snowflake, applies transformations using native Snowflake cortexML sentiment functions, and outputs a new Snowflake table and view for consumption by your teams or customers!


By following our straightforward steps, you can establish a streamlined data pipeline that sources, analyzes, and categorizes Yelp reviews in Snowflake within minutes. Ready to streamline your data integration and analysis process? Sign up for a free trial with Matillion and unlock the power of seamless cloud data management!
Konrad Bafia
Manager, Sales Engineering
Featured Resources
Enabling DataOps With Data Productivity Language
Discover how Matillion leverages Git and the Data Productivity Language (DPL) to enable seamless implementation of DataOps ...
BlogCustom Connector for Public Statistics (Police API)
A demonstration of the practical steps for setting up components, manipulating and validating data, creating and scheduling ...
BlogMastering Git At Matillion. An In-Depth Guide To Merging
Merging in Git is the process of integrating changes from one branch into another. Merging is the backbone of collaboration in ...
Share: