- Blog
- 04.29.2020
- Data Fundamentals
How to Get Matillion to Work With Snowflake Data Exchange
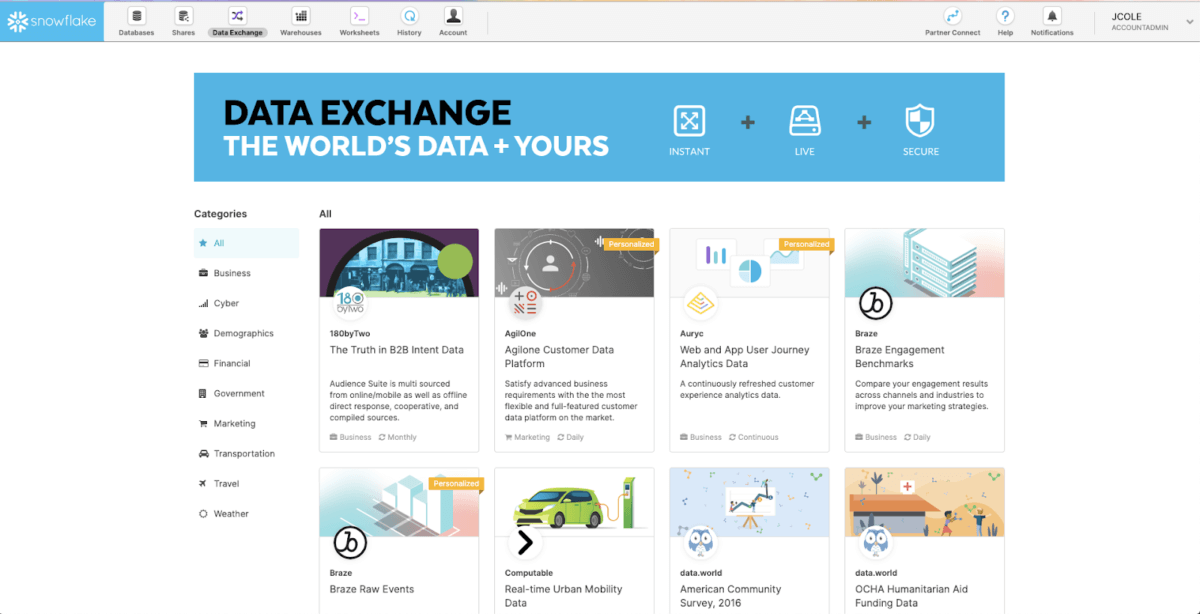
Snowflake’s new Data Exchange Platform allows Snowflake customers to access and download a range of different databases with pre-populated data. Regardless of your use case, this platform allows you to try out several data sources in order to find one that you feel matches most to the work you are doing. It not only helps eliminate the cost of collecting and maintaining this data, but it also gives you real-time data that you can use for analytics.
Using the Data Exchange Platform to analyze flight delays
In the following example, we will use Matillion ETL to rank flights data in order to obtain the longest delayed flight. We will then compare this with some weather conditions data for a specific day and location. We hope to see if there is a correlation between weather and flight delays.
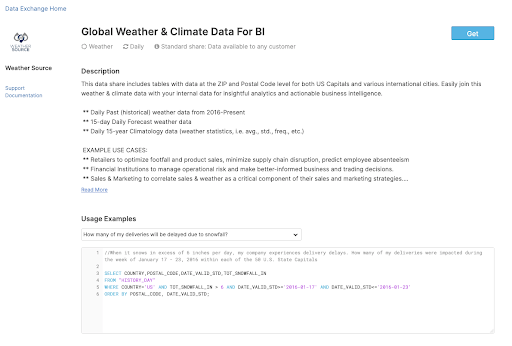
Let’s start by looking for an appropriate weather source within the Data Exchange Platform, accessible from your Snowflake account. We could try to collect this data and fill a new table owned by you. But instead, within the Snowflake Data Exchange Platform, we can find a pre-populated table with the information we need, created by a Snowflake approved user.
For the use case we are exploring, we will be using “Global Weather & Climate Data For BI” by Weather Source.
Note: to download this data, you need to be an account admin.
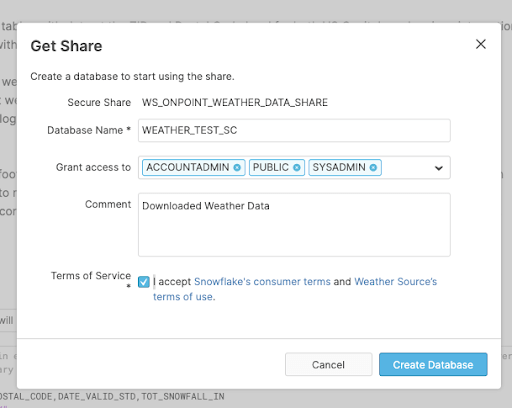
Clicking Get will prompt you with the following popup, where you can fill out the searchable name for the newly downloaded database and grant access to the relevant accounts. By accepting the terms and conditions, and clicking Create Database, you will now be given read access to Weather Source’s database.
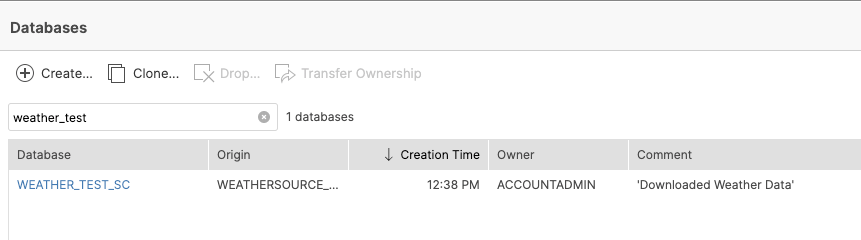
This database will now appear in your database list under the name you provided.
Let’s now use this newly acquired data with the flights data we already have in cloud storage, which we can load into Snowflake using Matillion ETL for Snowflake.
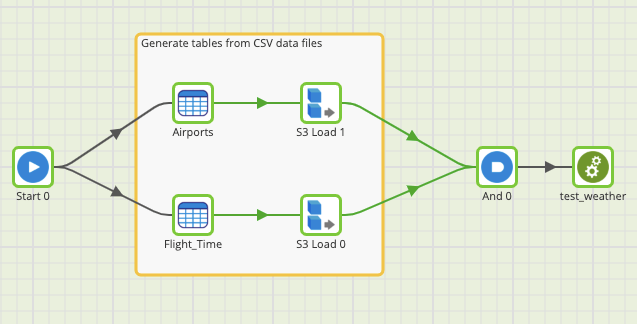
Creating the Orchestration Job
We start creating an Orchestration Job called test_weather_orc. In this job, we will be using two different S3 Load Generator components to create two tables: one containing data related to airports, and another one with flight details. If you are using Matillion ETL for Snowflake on Azure or GCP you can build the same job in their respective cloud storage components (Azure Blob or Cloud Storage Bucket). Once we have created these tables, we can use them in a Transformation Job called test_weather.
Creating the Transformation Job
In this job, we will use the Table Input component to access the tables we just created: Flight_Time and Airports.
Let’s start by joining the Flight_Time and Airports tables through the column containing the Iata values in order to know the names of the airports the flights are departing from. We now would like to globalize our date into YYYY/MM/DD format in order to get rid of the Year, Month and DayOfMonth columns. To do this, we will use a Calculator component to concatenate these three columns into one String and utilize the TO_DATE() function to convert these into a Date type.
To simplify this job, we will be focusing on 11 airports only: JFK, DEN, SEA, SFO, LAX, LAS, BOS, MIA, BPT, MCI and ORD. We will therefore filter the results to only display data associated with these locations. Moreover, we will use another Calculator component to append postcodes to each of the airports.
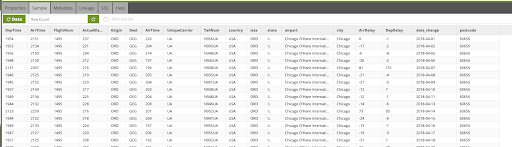
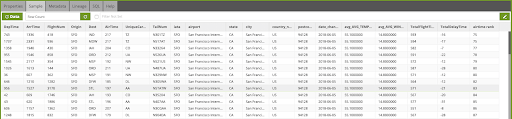
To make sure that both our data and our components are being transformed and set up correctly, we can use the Sample tab in each component, which will load sample output up to a specified number of rows.
We will now use another Table Input component to pull the data from the HISTORY_DAY table in our WEATHER_TEST_SC database.
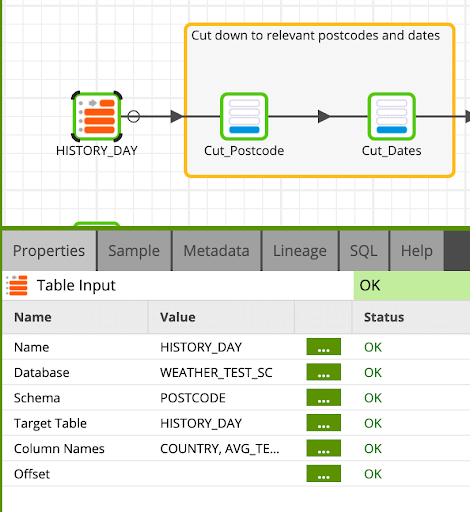
This table contains about 100 million rows of data. In order to make this more manageable, we will filter the data to only display the postcodes relevant to the airports mentioned above, and cut down the dates to only show data from 2018 onwards.
This table also has multiple temperature measurements for every single date. In an effort to further simplify our data, we will use an Aggregate component to average out these measurements for a given date at a specific postcode.
Finally, we have to convert the date to match the same format and data type as before, YYYY/MM/DD, using the TO_DATE() function.

Joining it all together
Now that we’ve filtered down and converted our data from both flows to fit each other, we can join these flows together through an inner join in the dates and postcodes.
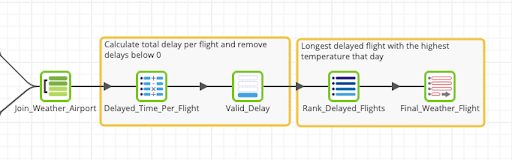
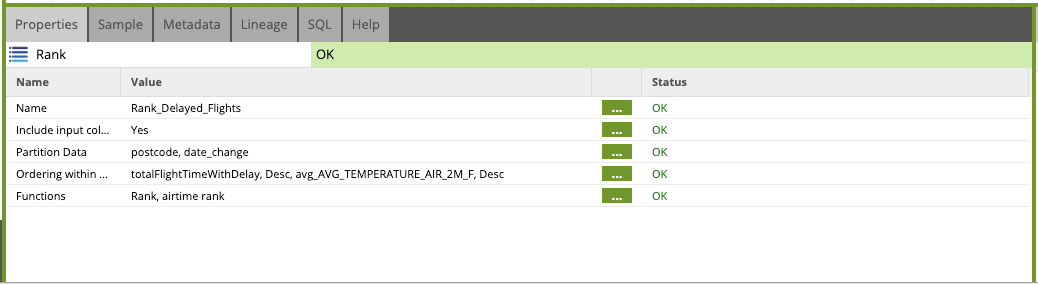
Our combined table has a DepTime and ArrTime which we can take advantage of in a Calculator component to calculate the totalFlightTime and the totalFlightTimeWithDelay. It is possible that the result for these variables could be equal to or smaller than 0. Therefore, we will use a Filter component to remove these results from our final data. All we need to do now is use a Rank component to list out, in descending order, all the flights from the longest delayed flight with the highest weather temperature to the least delayed flight with the lowest temperatures. To save this list as a new table in your Snowflake warehouse, we will use a Rewrite Table component.
An issue we have encountered that you might also experience is the need to adapt and change some of your data types and formats to fit the data found in the Data Exchange Platform in order to later, for example, join tables together. In this blog, I’ve had to adapt my dates and append postcodes to the airports in order to be able to join the two tables.
This is just one way of how you can use Snowflake Data Exchange within Matillion ETL. To learn more about how Matillion ETL is designed to work with Snowflake, download our ebook, Optimizing Snowflake.
Featured Resources
Data Productivity Cloud Now Offering Stronger Integrations For Databricks Users
Matillions Data Productivity Cloud on Databricks empowers data teams built around Databricks to be more productive and ...
BlogWhat Are Feature Flags?
Feature flags are a software development tool that has the capability to control the visibility of any particular feature. ...
BlogHow Your Data Teams Can Do More With Marketing Analytics
Improve your marketing analytics with Matillion Data Productivity Cloud that enables businesses to centralize and integrate ...
Share: