- Blog
- 09.19.2017
Using the Salesforce Query Component in Matillion ETL for Snowflake

Matillion uses the Extract-Load-Transform (ELT) approach to delivering quick results for a wide range of data processing purposes: everything from customer behaviour analytics, financial analysis, and even reducing the cost of synthesising DNA.
The Salesforce Query component presents an easy-to-use graphical interface, enabling you to connect to live Salesforce and Force.com. Many of our customers are using this service, for example, to do event tracking, case and task management. The component allows you to bring the Salesforce data into Snowflake for analysis and integration.
The connector is completely self-contained: no additional software installation is required. It’s within the scope of an ordinary Matillion license, so there is no additional cost for using the features.
Video
Watch our tutorial video for a demonstration on how to set up and use the Salesforce Query component in Matillion ETL for Snowflake.
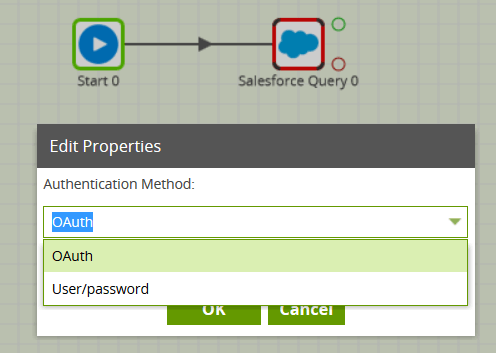
Authentication and Authorization
When you create an Orchestration job containing a Salesforce Query component, you’ll find that two authentication methods are available:
- Username, Password and Security Token
- OAuth
You can choose whichever method is more convenient.
User/password authentication
To use this option, you will need your Salesforce username and password, plus a Security Token, which can be generated or reset using the Salesforce site.
OAuth authentication
To use this option, you must first go to the Project / Manage OAuth menu, and follow the on-screen instructions. Use the Consumer Key and Consumer Secret to create a new Matillion OAuth entry for Salesforce. Once this is complete and has been authorised, choose the new Salesforce OAuth profile in the Salesforce Query’s Authentication property.
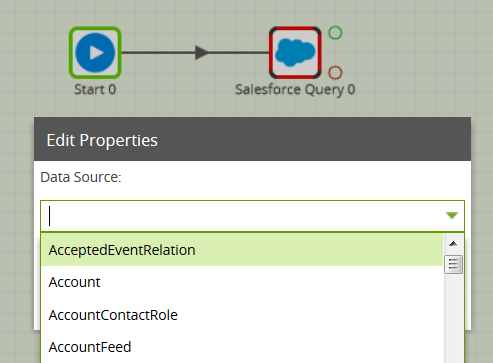
Data Source
Once security has been configured, you will then be able to choose a Data Source from the dropdown list. The Salesforce Data Model contains nearly 200 tables and views to choose from, in addition to any custom objects if you have created them.
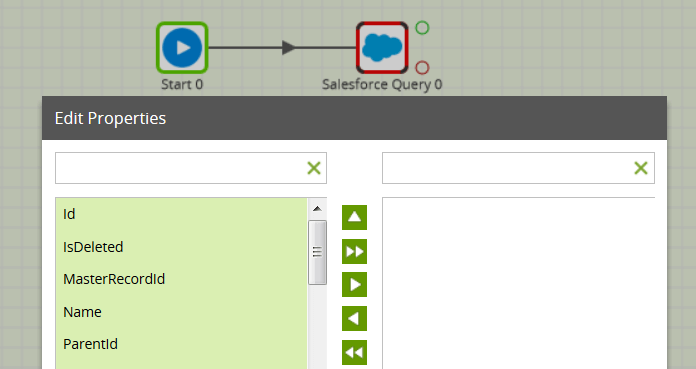
Having chosen a Data Source, you can then go to the next property and choose one or more names from the Data Selection dialog. These will form the columns of your Snowflake table.
Running the Salesforce Query
The final mandatory properties for this component are the Target Table name and an S3 Staging Area. The latter is the URL of an S3 bucket, which will be used temporarily to stage the queried data. You should be able to use the dropdown list of values.
Remember that this component also has a Limit property, defaulting to 100, which can be used to force an upper limit on the number of records returned.
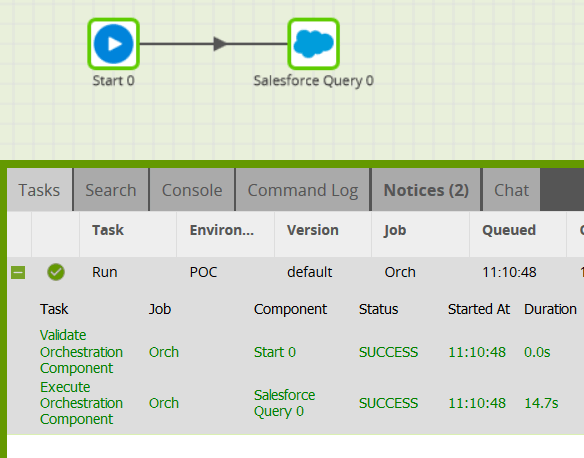
You can run the Orchestration job, either manually or using the Scheduler, to query your data from the Salesforce API, and bring it into Snowflake.
Exploring further
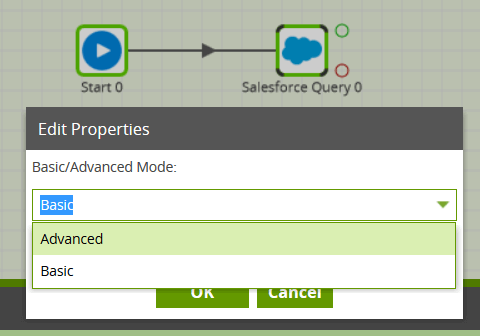
The Salesforce Query component offers an “Advanced” mode instead of the default “Basic” mode. In Advanced mode, you can write a SQL-like query over all the available fields in the data model. This is automatically translated into one or more Salesforce API calls on your behalf.
Once you have finished bringing all the necessary data from Salesforce into Snowflake, you can then use it in a Transformation job.
In this way, you can build out the rest of your downstream transformations and analysis, taking advantage of Snowflake’s power and scalability.
Useful Links
Salesforce Query Component in Matillion ETL for Snowflake
Begin your data journey
Want to try the Salesforce.com Query component in Matillion ETL for Snowflake? Request a free demo now, or launch on the AWS Marketplace.
Featured Resources
Best Practices For Connecting Matillion ETL To Azure Blob Storage
Matillion makes data work more productive by empowering the entire ...
BlogHow to Choose Your GenAI Prompting Strategy: Zero Shot vs. Few Shot Prompts
Large language models (LLMs) produce output in response to a natural language input known as a prompt. The prompt contains ...
BlogEnabling DataOps With Data Productivity Language
Discover how Matillion leverages Git and the Data Productivity Language (DPL) to enable seamless implementation of DataOps ...
Share: