- Blog
- 04.25.2023
- Dev Dialogues, Data Productivity Cloud 101
Salesforce data migration using Matillion Data Loader
Matillion Data Loader (MDL) is a no-code productivity platform that can copy source data into your target cloud data warehouse or lakehouse. This guide is a walkthrough of how to access Salesforce using MDL.
There are two steps involved. First, and once only, you will need to create your own Salesforce OAuth record. After that, you will use the OAuth record to query Salesforce. This guide will cover both steps.
Prerequisites
The prerequisites for performing Salesforce data migration are:
- Access to Matillion Data Loader
- You already have an MDL Destination. For example to Snowflake, as described in an earlier article about connecting Matillion Data Loader to Snowflake
- A Salesforce login
- Permission to create and edit MDL OAuths
Once you have met these prerequisites, choose the MDL Region you want to work in: 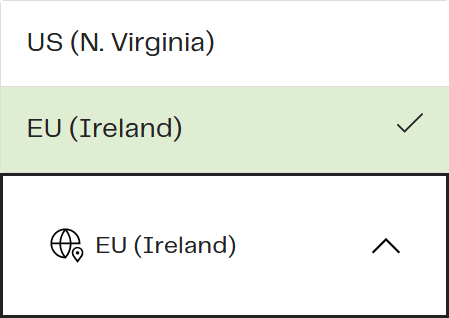 .. then go to Manage > OAuths from the MDL navigation menu to create your own Salesforce OAuth.
Salesforce OAuth in Matillion Data Loader
In common with many SaaS platforms, Salesforce uses OAuth to approve that a client application (MDL) is allowed to access your data.
MDL takes care of all the OAuth complications. You just need to log into Salesforce. There are two ways to do this:
Option 1 - Log into Salesforce in another tab in your browser, and leave yourself logged in while you work in the MDL tab
Here is a short video showing option 1 - creating an MDL OAuth while Salesforce is open in another tab.
Option 2 - Allow MDL to open a popup browser window to Salesforce. MDL will try to do this when you create the OAuth. You must make sure your browser allows popups from https://name-of-your-org.dataloader.matillion.com
Here is a short video showing option 2 - the Salesforce OAuth popup window.
Whichever method you choose, look for a "Your credential was authorized successfully" message:  Also be certain that the padlock icon shows a key symbol rather than a red X:
 ![]() Once you have an OAuth record, you can use it to set up a Salesforce data pipeline.
Once you have an OAuth record, you can use it to set up a Salesforce data pipeline.
Setting up a Salesforce Data Pipeline
Every Salesforce Data Pipeline reads from one or more Salesforce tables, and copies the data into one of your MDL Destinations.
Start by following Pipelines > Add pipeline, and choose Salesforce as the source. You should find your Salesforce OAuth appears in the dropdown. 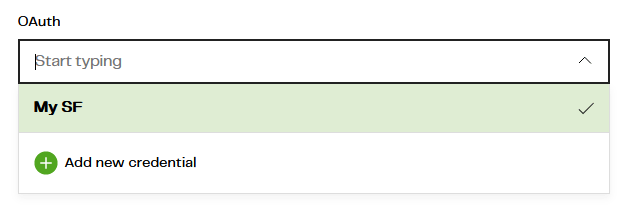 In the next screen, choose the table(s) you want to copy:
 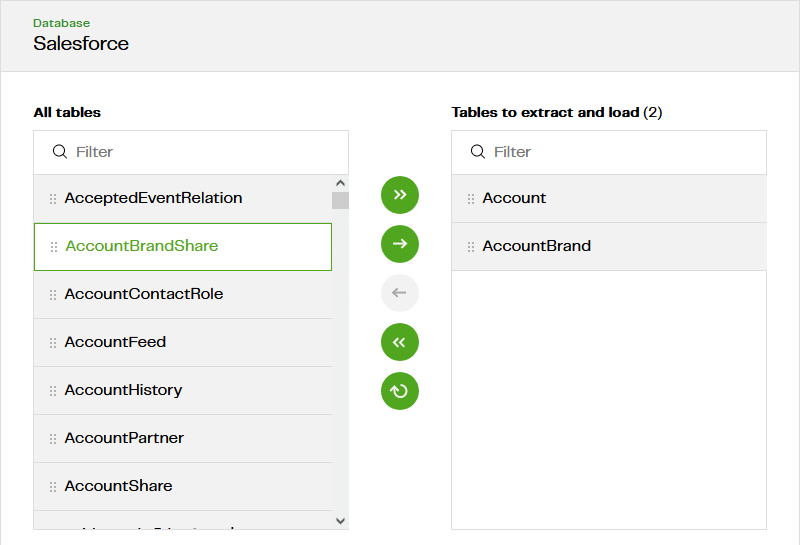 One MDL pipeline has one schedule. So choose all the tables that you wish to copy on the same schedule.
You don't have to bring all the columns into your target cloud data warehouse or lakehouse. The next screen gives the option to choose which columns you want. 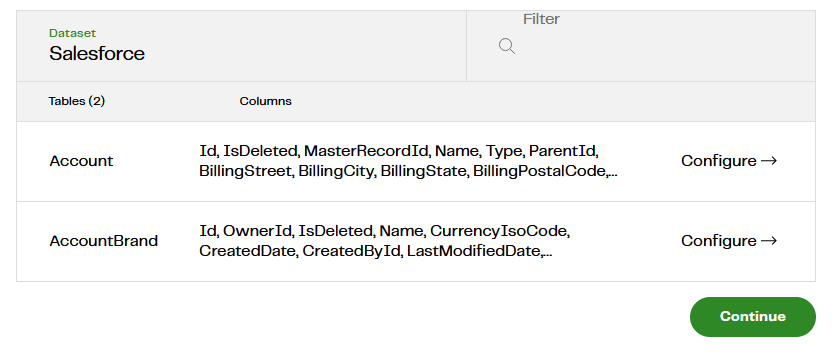 Note there is no need to set a primary key or incremental column. The information is usually needed to decide between incremental and full loading (more on that subject in the next section). But Salesforce has a well defined data model, so MDL does that for you.
In the Destination configuration screen, I strongly recommend you differentiate these newly loaded tables somehow. You could use a separate database or schema, or have MDL add a Load Table Prefix to the target table like this: 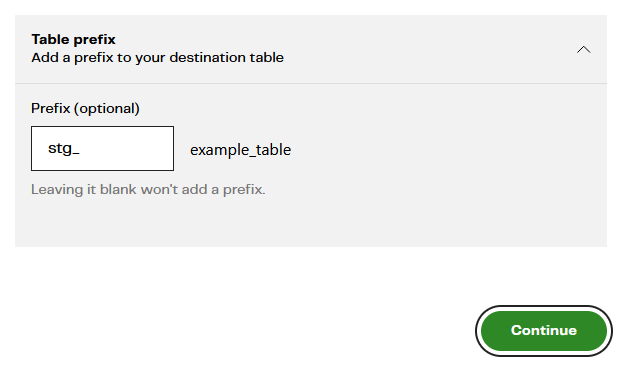 The names are case insensitive. The example I have documented so far will result in two new tables in your target cloud data warehouse or lakehouse:
- STG_ACCOUNT
- STG_ACCOUNTBRAND
The last step is to choose a refresh frequency. In the example below, the first run will be immediately after pressing Create Pipeline, and then every 12 hours after that. 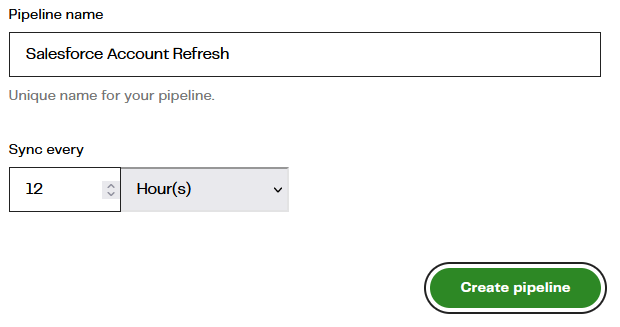 After waiting for the first run to complete, you should see confirmation in the pipelines console:
  From now on, every 12 hours, MDL will keep the new STG_ACCOUNT and STG_ACCOUNTBRAND tables up to date with any changes made in Salesforce.
Most Salesforce tables are almost always refreshed incrementally. Occasionally the system may fall back to doing a full reload.
Full Reload vs Incremental Load
When copying a table from place to place, the simplest strategy is to just copy all the rows every time. This is the simple full reload approach. MDL must delete everything from the target table first - known as "truncating" - so this method is known as truncate-insert.
In batch loading it is usually more efficient to only copy records that are known to have changed. Salesforce maintains a last-modified timestamp on almost every table, which makes this incremental loading strategy possible. MDL only transfers new records each time, so there is no need to truncate the target table first. Hence this method is known as append-insert.
Many relational database tables have a unique identifier column known as a primary key. For tables like this, MDL is able to build on the append-insert strategy, and update the record in the target table if it already exists. That means the target table never ends up with multiple versions of the same record, which makes it much easier to read.
To verify which method your own MDL pipeline is using, check in the logs. Follow View Pipeline > Logs, and press the down arrow to view the log records. Search for "load strategy" in the text.
This example performed a full reload:  This example performed an incremental load with a primary key:
Learn more about Matillion Data Loader
You are ready to build your own Salesforce data pipelines! Copying (or co-locating) data is the first step in every data transformation and integration methodology.
Try Matillion Data Loader today for free. Once you register, you can load up to a million rows of batch data for free every month.
To experience the ease-of-use and power of Matillion Data Loader, take a product tour in our interactive demo.
Andreu Pintado
Featured Resources
What Are Feature Flags?
Feature flags are a software development tool that has the capability to control the visibility of any particular feature. ...
BlogHow Your Data Teams Can Do More With Marketing Analytics
Improve your marketing analytics with Matillion Data Productivity Cloud that enables businesses to centralize and integrate ...
BlogThe Importance of Data Classification in Cloud Security
Data classification enables the targeted protection and management of sensitive information. Personally Identifiable ...
Share: